How to Plan Your Camper Electrical System 2026: The Complete Guide
Plan your camper, van, or RV electrical system step by step: calculate power needs, size your battery bank, plan solar, wire it safely, and create a wiring diagram. Free calculators included.
Building a camper, van, or RV? The electrical system is one of the most complex parts of the build — and one of the most expensive to get wrong. Undersized batteries run flat on day two. Wires sized by feel overheat. Missing fuses turn a short circuit into a fire.
This guide walks you through all six planning steps in the right order — from calculating your daily power needs to creating a complete wiring diagram you can actually build from. Skip ahead if you know the basics; use it as a checklist if you are mid-build.
After this guide you will know:
- How large your battery bank needs to be
- How much solar you actually need
- Which wire gauges to use and why
- How to fuse every circuit correctly
- How to create a complete wiring diagram before you drill the first hole
What This Guide Covers
The six steps below build on each other — don't skip any of them:
- Calculate your power needs — what do you actually use each day?
- Size your battery bank — how much storage and which chemistry?
- Plan your charging system — solar, alternator, shore power
- Calculate wire gauges — with the right formula, not guesswork
- Fuses and protection — every wire needs protection at the source
- Create your wiring diagram — document before you build
Step 1: Calculate Your Power Needs
Everything starts here. Builders who skip this step or guess too rough almost always buy too little battery — and then wonder why their system fails on a cloudy day.
The Calculation Formula
Power (watts) × daily hours of use = daily consumption (Wh)
Do this for every device you plan to run, then add them up.
Typical Camper and Van Power Loads
| Device | Power (W) | Hours/Day | Daily (Wh) |
|---|---|---|---|
| 12V compressor fridge (Dometic, Engel) | 30–60 | 10–16 (cycling) | 240–600 |
| Roof vent fan (Maxxair, Fan-Tastic) | 15–35 | 6–10 | 90–350 |
| LED interior lighting | 2–8 per fixture | 4–6 | 30–200 |
| 12V water pump | 30–60 | 0.5–1 | 15–60 |
| Phone charging | 15–25 | 2–4 | 30–100 |
| Laptop | 45–65 | 2–8 | 90–520 |
| Diesel/gas heater (Webasto, Espar) | 10–25 | 8–12 | 80–300 |
| CO / gas alarm | 1–3 | 24 | 24–72 |
| Bluetooth speaker / radio | 5–20 | 3–5 | 15–100 |
| Inverter standby (while on) | 5–20 | 8–12 | 40–240 |
| Coffee maker (120V/230V, brief) | 800–1,200 | 0.2–0.5 | 160–600 |
| Air conditioner | 400–800 | 3–6 | 1,200–4,800 |
Daily consumption benchmarks by build style:
- Weekend warrior, minimal: 400–800 Wh/day
- Road tripper, moderate comfort: 800–1,500 Wh/day
- Full-time vanlife, no home office: 1,200–2,000 Wh/day
- Full-time with laptop / monitors: 2,000–3,000 Wh/day
- Family rig, all the comforts: 2,500–4,500 Wh/day
How Many Autonomy Days to Plan For
Autonomy days = how many days you want to run without any charging. Two days is a sensible baseline for most rigs in North America and Europe — that covers a rainy weekend at a campsite or a day of driving with no solar yield.
Total storage needed = daily consumption × autonomy days
Example: 1,400 Wh/day × 2 days = 2,800 Wh total storage requirement.
Use the free Battery Bank Calculator to go from watt-hours to amp-hours based on your battery chemistry.
Step 2: Size Your Battery Bank and Choose Your Chemistry
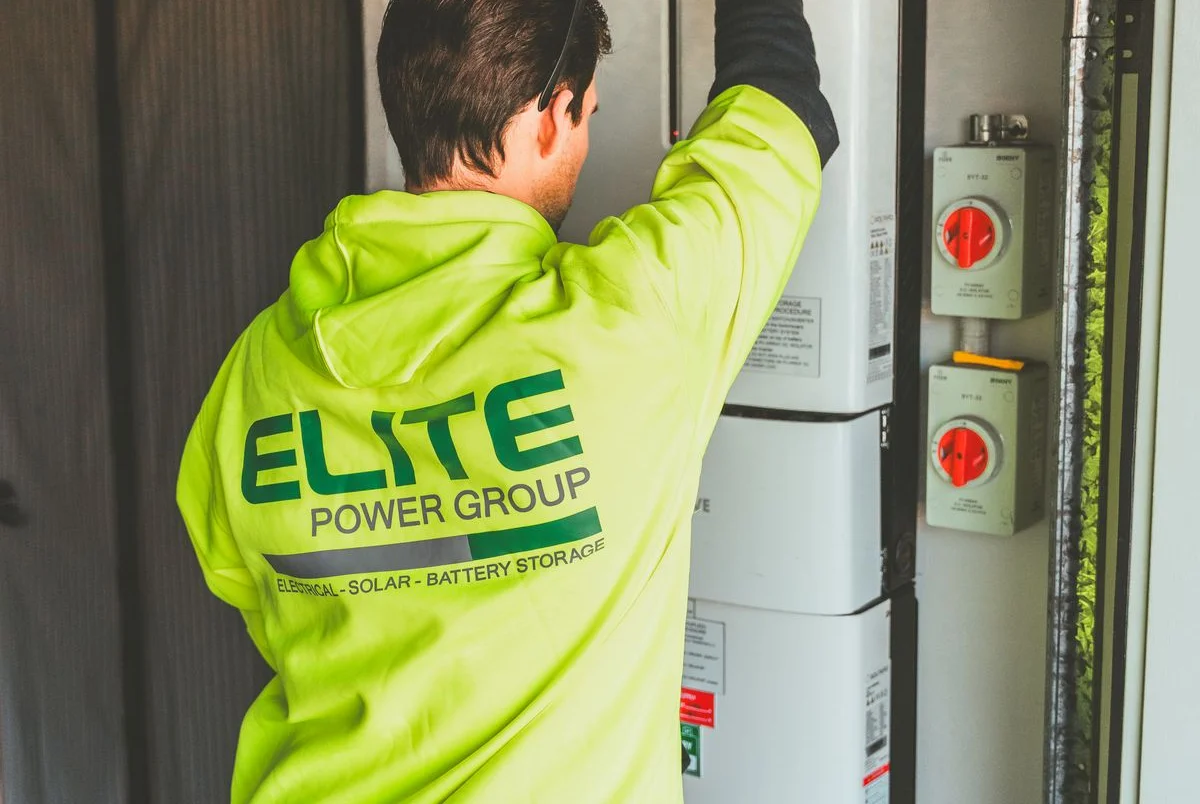 Photo: Elite Power Group / Pexels
The battery is the heart of your electrical system. Two mistakes happen here over and over: buying too little capacity and choosing the wrong chemistry for the use case.
The Sizing Formula
Required capacity (Ah) = (Total Wh needed ÷ system voltage) ÷ depth of discharge (DoD)
Example with 2,800 Wh needed at 12V:
- LiFePO4 (80% DoD): 2,800 ÷ 12 ÷ 0.80 = 292 Ah → round up to 300 Ah
- AGM (50% DoD): 2,800 ÷ 12 ÷ 0.50 = 467 Ah → round up to 500 Ah
- Flooded lead-acid (50% DoD): same as AGM for capacity planning
The same energy goal requires far less rated capacity from lithium — which directly translates to less weight and less space.
Battery Chemistry Comparison
| Feature | LiFePO4 | AGM | Flooded Lead-Acid |
|---|---|---|---|
| Usable depth of discharge | 80–90% | 50% | 50% |
| Cycle life | 2,000–5,000 | 400–800 | 300–500 |
| Weight (per kWh) | ~13–18 lbs | ~44–55 lbs | ~44–55 lbs |
| Charge acceptance | Excellent | Moderate | Moderate |
| Cold charging | No below 32°F (0°C) | Tolerant | Tolerant |
| Upfront cost | High | Low | Very low |
| Cost per cycle | Low | Moderate | Moderate |
| Maintenance | None | None | Water top-up |
| BMS required | Yes (usually built-in) | No | No |
Recommendation for 2026 builds: LiFePO4 has become the default for serious camper builds. The higher upfront cost pays off through 5–10× the cycle life, double the usable capacity, and 60% less weight. AGM makes sense only if the budget is very tight and you plan to rebuild the system within two or three years — then the savings might be real. Over the full lifetime, LiFePO4 is almost always cheaper.
Series vs. Parallel Battery Wiring
For a 12V system, wire batteries in parallel (all positives together, all negatives together). Capacity (Ah) adds up; voltage stays 12V.
For a 24V system, wire two 12V batteries in series (positive of one to negative of the other). Lower currents mean thinner wires and better efficiency at high loads.
24V makes sense above about 2,500 Wh capacity or when planning a large inverter (above 2,000W). 48V is used in very large off-grid installations — rare in camper builds.
Important with LiFePO4 in parallel: Only combine identical batteries from the same production batch. Mixing batteries at different states of aging can stress the BMS of the weaker unit.
Cold-Weather Charging
LiFePO4 batteries cannot be charged below 32°F (0°C) — lithium plating damages the cells permanently. If you camp in cold climates, you need either a battery box with a heater or batteries with a built-in heating element (many quality units include this). Discharging below freezing is fine; charging is not.
Step 3: Plan Your Charging System
A battery that can't be reliably recharged is useless. Your charging sources need to collectively replace your daily consumption on a typical travel day.
Solar: The Backbone of Off-Grid Power
Solar is the primary charging source for most camper setups.
How much solar do you need?
Rule of thumb: Solar (watts peak) = daily consumption (Wh) ÷ (peak sun hours × 0.75 system efficiency)
Peak sun hours vary by location and season:
- American Southwest, summer: 6–8 hours
- Pacific Northwest, summer: 4–5 hours
- UK / Northern Europe, summer: 3.5–5 hours
- Any continental location, winter: 1–3 hours
Example: 1,400 Wh/day, US Southwest summer (6 hours): 1,400 ÷ (6 × 0.75) = 311 watts peak → 2× 175W panels
For year-round reliability in northern latitudes, multiply the summer result by 2–3.
MPPT vs. PWM charge controllers
| MPPT | PWM | |
|---|---|---|
| Efficiency | 93–99% | 70–80% |
| Works with higher panel voltage | Yes | No |
| Partial shade performance | Better | Worse |
| Price | Higher | Lower |
| Recommendation | Any system above 100W | Tiny setups only |
MPPT controllers recover 15–25% more energy than PWM — the price difference pays off within a season for any meaningful array.
Wiring panels in series vs. parallel
- Series: Higher voltage, lower current. Thinner wire from the roof, less voltage drop on long cable runs. The right choice with MPPT controllers.
- Parallel: Same voltage as one panel, current multiplies. More vulnerable to partial shading (one shaded panel drags the whole string). Better suited to PWM.
For most installations: use series (or series-parallel) with an MPPT controller. Your controller datasheet specifies the maximum input voltage — don't exceed it.
Size your solar precisely: Solar Panel Calculator
Alternator Charging: Power While You Drive
Charging from the alternator covers days with no sun or no shore power access.
DC-DC charger (battery-to-battery charger) — the right choice for lithium
A simple split-charge relay passes alternator voltage to your house battery, but it doesn't provide the right charge profile for LiFePO4 and can cause problems with modern vehicles that use smart alternators. A DC-DC charger (B2B charger) solves both issues:
- Delivers a proper charge profile regardless of alternator output voltage
- Protects the starter battery from deep discharge
- Compatible with Euro 5/6 vehicles and variable-voltage smart alternators
- Typical output: 20–60A (240–720W at 12V)
At 4 hours of driving and a 40A charger: 4 × 40 × 12 = 1,920 Wh added — enough to replace most moderate daily budgets.
Shore Power: Camping with hookups
A mains charger (converter/charger) on 120V (North America) or 230V (Europe) lets you charge fully overnight at a campground hookup:
- Typical output: 20–100A with a multi-stage IUoU charge profile
- For LiFePO4: verify the charger has a lithium/LiFePO4 mode — avoid chargers that run an equalization phase (LiFePO4 doesn't need it and it can damage cells)
- A 30A shore power hookup (standard at US campgrounds) provides up to 3,600W available — plenty for charging and running AC loads simultaneously
Generator: Insurance for Extended Bad Weather
A 2,000–3,000W inverter generator (Honda EU2200i, Yamaha EF2200iS, etc.) covers extended cloudy periods or high-load devices. Noise and fuel costs argue against everyday use, but as a backup for a week of rain it is hard to beat.
Step 4: Calculate Wire Gauges
Wrong wire sizing is the most common safety defect in amateur camper builds. Undersized wires run hot, melt insulation over time, and can start fires. Oversized wires are just wasted money. Size them correctly with the formula below.
The Voltage Drop Rule
The standard for 12V wiring in vehicles is a maximum 3% voltage drop across any single circuit (some sources use 5% for lighting circuits, 3% for critical loads).
- 12V system: max drop = 0.36V per wire run
- 24V system: max drop = 0.72V per wire run
More voltage drop means less power at the device and more heat in the wire — both bad.
The Wire Sizing Formula
A (cross-section, mm²) = (2 × L × I) / (conductivity × allowable drop)
- L = one-way cable length in meters
- I = current in amps
- conductivity of copper = 56 m/(Ω·mm²)
- allowable drop = 0.36V (for 12V at 3%)
Or use AWG: the formula applies equally; just convert the result. Common AWG equivalents:
| AWG | mm² | Common camper use |
|---|---|---|
| 20 AWG | 0.5 mm² | Signal wires, remote triggers |
| 18 AWG | 0.75–1.0 mm² | Light-duty lighting |
| 16 AWG | 1.5 mm² | LED lighting circuits |
| 14 AWG | 2.5 mm² | Pumps, fans, 12V outlets |
| 12 AWG | 4 mm² | Fridge, DC-DC charger |
| 10 AWG | 6 mm² | Solar charge controller output |
| 8 AWG | 10 mm² | Small inverter (≤500W) |
| 6 AWG | 16 mm² | Medium inverter (≤1,500W) |
| 4 AWG | 25 mm² | Large inverter |
| 2 AWG | 35 mm² | Inverter above 2,000W |
| 1/0 AWG | 50 mm² | Main bus cable, large systems |
| 2/0 AWG | 67 mm² | High-current main cables |
Quick Reference Table for Common Circuits
| Load | Current (A) | Wire Run (ft) | Min Wire Size | Fuse |
|---|---|---|---|---|
| LED lighting | 2–4 | 10–20 | 16 AWG | 6–10A |
| Water pump | 5–10 | 6–12 | 14 AWG | 10–15A |
| Roof vent fan | 4–8 | 6–12 | 14 AWG | 10–15A |
| 12V compressor fridge | 5–10 | 4–10 | 12–14 AWG | 15–20A |
| 12V outlets / USB | 10–15 | 6–12 | 12–14 AWG | 15–20A |
| DC-DC charger 20A | 20 | 3–8 | 12 AWG | 25–30A |
| DC-DC charger 40A | 40 | 3–6 | 8 AWG | 50A |
| Inverter 1,000W | ~90 | 2–5 | 4 AWG | 100–125A |
| Inverter 2,000W | ~180 | 1–3 | 2/0 AWG | 200–250A |
| Main battery cable | system | short | 2/0–4/0 AWG | main fuse |
Calculate exact wire gauge and verify voltage drop: Wire Gauge Calculator
Wire Types for Campers
Not all wire is equal for mobile use:
- THHN / THWN: Common US building wire, acceptable for fixed runs in a dry environment inside the van body
- Marine-grade tinned copper wire: Tinned strands resist corrosion in wet environments. Better for any location that sees moisture (under the van, near the roof)
- SGX / SGT automotive wire: Rated for high temperatures, flexible, good for engine-area and chassis runs
- Welding cable: Ultra-flexible stranded copper — excellent for battery interconnects and inverter cables that need to flex
Always use stranded wire for mobile applications, never solid-core wire. Solid wire cracks at vibration points.
Step 5: Fuses and Protection Devices
No wire runs without protection. Fuses protect the wire — not the device. A short circuit without a fuse means the wire melts and potentially starts a fire. No exceptions.
The Golden Rule: Fuse as Close to the Source as Possible
Every positive wire leaving a battery or busbar must be fused within 7 inches (18 cm) of that connection point (ABYC standard; 18 inches / 45 cm is sometimes cited for less critical vehicle applications — shorter is always better).
Fuse Types for 12V Systems
Blade fuses (ATO/ATC, mini, maxi): Common, widely available, rated to 30–40A maximum. Use in fuse panels for individual branch circuits.
ANL fuses: Bolt-on, 80–400A range. Standard for the main battery cable — install one within a few inches of the positive terminal.
MIDI fuses: 30–150A, compact bolt-on format. Good for mid-range applications (DC-DC charger, charge controller output).
Class T fuses: Very fast-blow, designed specifically for lithium battery systems — highly recommended as the main fuse for LiFePO4 installations over 200Ah.
Circuit breakers: Can replace fuses in branch circuits. Resettable — no fuse replacement needed. Good for appliances you test-run frequently. Not a direct substitute for ANL/Class T on the main cable.
Typical Protection Layout
Battery (+)
  └── Main fuse: ANL or Class T (e.g. 200A), within 7 inches of battery
        └── Main disconnect switch
              └── Positive busbar
                    ├── Fuse panel (branch circuits)
                    │     ├── 10A → Lighting
                    │     ├── 15A → Pump / fan
                    │     ├── 20A → Fridge
                    │     └── 30A → DC-DC charger
                    └── 100–250A inline fuse → Inverter (direct cable)
Battery Disconnect Switch
A main disconnect switch is not strictly required by code for a camper build, but it is best practice:
- Allows safe disconnection before any maintenance
- Cuts parasitic drain during long storage
- Some RV parks require an accessible disconnect for fire safety
Common choices: a simple on/off rotary switch (Blue Sea, Victron), or a remotely operable solid-state relay.
Battery Management System (BMS)
Every LiFePO4 battery needs a BMS. It protects the cells from:
- Overcharge (above 3.65V per cell)
- Over-discharge (below 2.5V per cell)
- Over-temperature during charging (critical at freezing)
- Overcurrent
Consumer-grade LiFePO4 batteries (Battle Born, Renogy, Liontron, etc.) have integrated BMS units. DIY builds using raw cells (EVE, CATL) need an external BMS — a JK-BMS or Daly BMS is a common choice. For first-time builders, a pre-built battery with an integrated BMS is strongly recommended over a DIY cell build.
Step 6: Create Your Wiring Diagram
 Example diagram: 200Ah LiFePO4, 400W solar, DC-DC charger, shore power charger — created with VoltPlan
The wiring diagram is the blueprint for your build. It comes before you install anything — not after. Without it, you wire errors in and spend hours tracing them later.
What a Complete Wiring Diagram Contains
A proper diagram documents:
- Every component with make, model, and rated values (e.g., "Victron SmartSolar MPPT 100/30")
- Every wire with gauge and length
- Every fuse with amp rating and type
- All connection points (busbars, terminal blocks, connectors)
- Wire colors (red = positive, black = negative, green/yellow = AC ground if applicable)
- Current flow direction — arrows help trace faults later
- Measurement points — where you check voltage under load
Wiring Diagram Conventions
The symbology used in 12V vehicle wiring diagrams varies by region, but these basics are consistent:
- Two parallel lines (long and short) = battery cell / battery
- Zigzag line = resistor or fuse
- Half-circle = diode
- Crossed circle = lamp or LED
- Interrupted line with arrow = switch
- Circle with wavy line = AC source / generator
For camper builds, simplified block diagrams are often clearer than full schematic notation — what matters is that every connection, every wire size, and every fuse value is recorded.
Build Your Diagram with VoltPlan
VoltPlan is a free online wiring diagram editor built specifically for 12V systems in campers, vans, boats, and off-grid setups:
- Choose a template that matches your planned system
- Drag and drop your components (battery, solar controller, inverter, loads)
- Connect them — VoltPlan suggests wire gauges automatically
- Export the finished diagram as a PDF
The finished diagram is your build reference, your troubleshooting guide, your documentation for mechanics, and evidence for insurance claims.
Create your free wiring diagram
The 8 Most Common Camper Electrical Planning Mistakes
These show up constantly in build forums and in systems that need to be rebuilt:
1. Underestimating power consumption Most builders calculate 600–900 Wh and end up using 1,400–2,000 Wh once they are actually living in the van. Track your usage at home with a Kill-A-Watt meter on your devices before you size anything.
2. Too little battery capacity — and forgetting the safety buffer Always add 20–30% margin on top of your calculated requirement. Batteries age, efficiencies drop, and you will use more than planned.
3. No DC-DC charger in modern vehicles Euro 5/6 and late-model North American trucks use variable-voltage "smart alternators." A basic split-charge relay delivers little or no charge from these systems. Always use a proper DC-DC charger.
4. Wire sizing by feel instead of calculation "That wire looked thick enough" is not a design methodology. A 14 AWG wire on a 10-amp circuit over 15 feet has a 5% voltage drop — exceeding the safe limit and reducing device performance.
5. Fuse placed at the wrong end of the wire The fuse protects the wire, not the device. It must be at the source, as close as possible to the battery or busbar — not at the end of a long run near the appliance.
6. Undersized negative return path The negative wire must carry the same current as the positive and must be sized identically. A properly sized positive wire with an undersized negative still causes voltage drop and heat buildup on the negative side.
7. No AC ground fault protection Any 120V or 230V AC circuit powered by an inverter or shore power hookup must have a ground fault circuit interrupter (GFCI). A fault in a damp camper interior without GFCI protection is potentially lethal.
8. No wiring diagram after the build Without a diagram, you cannot tell a mechanic which wire does what. After a year, neither can you. It takes about two hours to create one in VoltPlan — it saves days of troubleshooting later.
Cost Breakdown: What a Camper Electrical System Actually Costs
Costs depend heavily on system size and component quality. These ranges reflect real-world 2026 pricing for quality but not exotic components.
Basic Weekend Rig (~600 Wh/day)
| Component | Typical Cost |
|---|---|
| 100Ah LiFePO4 battery | $250–$450 |
| 20A MPPT charge controller | $40–$120 |
| 2× 100W solar panels | $80–$200 |
| 20A DC-DC charger | $80–$160 |
| Fuse panel + busbars | $30–$80 |
| Wire, fuses, connectors | $50–$150 |
| Misc hardware | $30–$80 |
| Total | $560–$1,240 |
Mid-Range Road Tripper (~1,500 Wh/day)
| Component | Typical Cost |
|---|---|
| 200Ah LiFePO4 battery | $450–$800 |
| 40A MPPT charge controller | $100–$220 |
| 400W solar (2× 200W) | $160–$400 |
| 30A DC-DC charger | $120–$220 |
| 1,000W pure sine inverter | $100–$280 |
| Battery monitor (Victron BMV or ShuntSmart) | $60–$130 |
| Fuse panel, busbars | $60–$160 |
| Wire, fuses, connectors | $100–$260 |
| Total | $1,150–$2,470 |
Full-Time Build, Home Office (~2,500+ Wh/day)
| Component | Typical Cost |
|---|---|
| 300–400Ah LiFePO4 | $800–$1,600 |
| 60–100A MPPT charge controller | $160–$420 |
| 600–800W solar | $300–$800 |
| 40–60A DC-DC charger | $160–$320 |
| 2,000–3,000W inverter-charger | $350–$900 |
| Battery monitor / SmartShunt | $80–$200 |
| Fuse panel, busbars, main switch | $100–$320 |
| Wire, fuses, connectors, hardware | $200–$500 |
| Total | $2,150–$5,060 |
These are material costs only. Professional installation in a shop typically adds $800–$2,000 in labor.
Planning for Different Vehicle Types
The six steps apply to every build, but the constraints vary by vehicle.
Cargo Vans (Transit, Sprinter, Promaster)
- Floor space is precious: batteries under the bed platform or in a dedicated cabinet behind the driver seat
- Factory ground: use the van body as negative return — run a short negative wire to a clean metal chassis point
- Smart alternator common: DC-DC charger is mandatory, not optional
- Roof rails on most cargo vans can support panel mounting without roof penetrations (using Fiamma-style mounts or L-brackets)
VW Vanagon / Westfalia / Bus
- Existing 12V system: electrically isolate your house system from the chassis for cleaner operation
- Pop-top roof limits panel area: use flexible or semi-flexible panels; fold-out panels on the ground work well at a campsite
- LiFePO4 advantages especially pronounced here — original battery compartments are small
Overland / Expedition Truck
- Long cable runs: 24V system recommended above about 3,000 Wh to keep wire sizes manageable
- Redundancy matters: two independent charging sources, manual bypass switches, labeled junction boxes
- Vibration rating on all connections: use ring terminals with locking hardware (split washers) on all bolted connections
- Laminated wiring diagram bolted inside a cabinet — the next person who opens it needs to understand the system
Travel Trailers and Motorhomes
- 7-way trailer plug (US) provides charging from the tow vehicle, but current is limited (~8–12A) — supplement with DC-DC charger on its own cable for serious systems
- 30A / 50A shore power hookup is standard in North America — size your converter/charger to match the hookup
- Weight balance matters: mount heavy batteries near or ahead of the axle centerline
Build Checklist: Before You Start
Use this before you buy anything or drill any holes:
Design phase
- Daily power consumption calculated for all devices
- Autonomy days decided
- Battery capacity calculated (Wh → Ah at your DoD)
- Battery chemistry chosen and justified
- System voltage chosen (12V or 24V)
- All charging sources sized (solar, DC-DC, shore power)
- Wire gauges calculated for every major circuit
- Fuse values chosen for every circuit
- Main fuse sized (and fuse type chosen for LiFePO4)
- Wiring diagram drawn and reviewed
Shopping and preparation
- All components checked for charge voltage compatibility with battery chemistry
- Consistent wire color code planned (red +, black −, green/yellow AC PE)
- Proper crimp tool and ring terminals in matching sizes
- Cable ties, split loom, grommets ordered for protection and routing
- Multimeter on hand for installation testing
Installation
- Battery disconnected before any work
- Fuses installed only after full wiring is complete
- All connections crimped (not loose-terminal block connections)
- All ground connections made to bare metal (paint removed)
- All cables strain-relieved and protected from abrasion
Commissioning
- Voltage checked at battery, after main fuse, at busbar — before energizing anything
- Each circuit tested one at a time
- Voltage drop under load measured and confirmed within spec
- Wiring diagram finalized, printed, and stored in the vehicle
Frequently Asked Questions
How much battery do I need for a camper or van?
Calculate your daily power consumption by multiplying watts × hours for each device and adding them up. Multiply by your desired autonomy days (use 2 as a starting point). Then divide by the depth of discharge: 80% for LiFePO4, 50% for AGM. Finally divide by system voltage (12 or 24) to get amp-hours.
How many solar panels do I need for a camper?
Divide your daily watt-hour consumption by your expected peak sun hours and by 0.75 for system efficiency. Example: 1,400 Wh ÷ (5 hours × 0.75) = 373 watts peak. Round up and add 20% margin. For year-round reliability in northern latitudes, multiply by 2–3 to account for winter.
LiFePO4 or AGM — which is better for a van build?
LiFePO4 is better for almost every full-time or extended-use build: it offers double the usable capacity, 5–10 times the cycle life, and 60% less weight. AGM makes financial sense only if the budget is severely limited and you plan to replace or upgrade the system within a couple of years.
Can I do a camper electrical install myself?
Yes — 12V DC work in your own vehicle does not require a licensed electrician in most jurisdictions. The 120V/230V AC side (inverter output, shore power) requires care: follow NEC (US) or applicable wiring standards, install GFCI protection, and size conductors correctly. Check your local code and insurance requirements before energizing the AC system.
What wire size do I need for my inverter?
It depends on the inverter's wattage and the cable length. A 2,000W inverter at 12V draws about 180A continuous. For a 2-foot cable run, you need at least 2/0 AWG. For a 4-foot run, use 4/0 AWG. Always size for the inverter's surge capacity on startup, not just continuous rating — motor loads (compressors, fans) draw 5–10× rated current for half a second.
What is the maximum voltage drop allowed in a van build?
The standard is 3% of system voltage on any single circuit. For 12V, that is 0.36V. For 24V, 0.72V. Exceeding this means the device receives less voltage than it needs, and excess heat builds up in the wire. Five percent is sometimes accepted for lighting-only circuits. Use the wire gauge calculator to check every major run.
How long does a LiFePO4 battery last in a camper?
Quality LiFePO4 cells (EVE, CATL, Lishen) are rated for 2,000–5,000 cycles to 80% remaining capacity. At one cycle per day that is 5–14 years. In real camper use, a well-managed system from a quality manufacturer typically lasts 8–12 years. Key factors: avoid deep discharge below 10%, never charge below freezing, and avoid storing at full charge for weeks at a time (80% is better for storage).
Do I need to register or inspect my camper electrical system?
In most US states, modifications to a personal vehicle's 12V system do not require inspection. If you are re-registering the vehicle as an RV or motorhome, your state DMV may require a certifying inspection. The 120V AC system should conform to NEC Article 551 (RVs) or equivalent. In Europe, the VDE standards apply and a TÜV inspection may be required for re-registration as a Wohnmobil. Check with your local authority before completing a major build.
What is a DC-DC charger and why do I need one?
A DC-DC charger (also called a battery-to-battery or B2B charger) converts the alternator's varying output voltage into a stable charge profile for your house battery. Modern vehicles with smart alternators vary their output between 12.5V and 15V depending on driving conditions and fuel economy algorithms. A simple relay passes this variable voltage directly to your battery — a DC-DC charger smooths it into the correct IUoU charge curve for your battery chemistry. It also protects your starter battery from being drained if your house battery is deeply discharged.
Ready to Design Your Electrical System?
Use VoltPlan's free electrical system designer to turn these concepts into reality.
Start Your Project