


Renogy Van Electrical System: A Complete 12V Build With Wiring Diagram
A complete 12V van system from Renogy parts: 200 Ah LiFePO4, DCC50S, 400 W solar, shore charger and 2000 W inverter, with the numbers and a ready diagram.
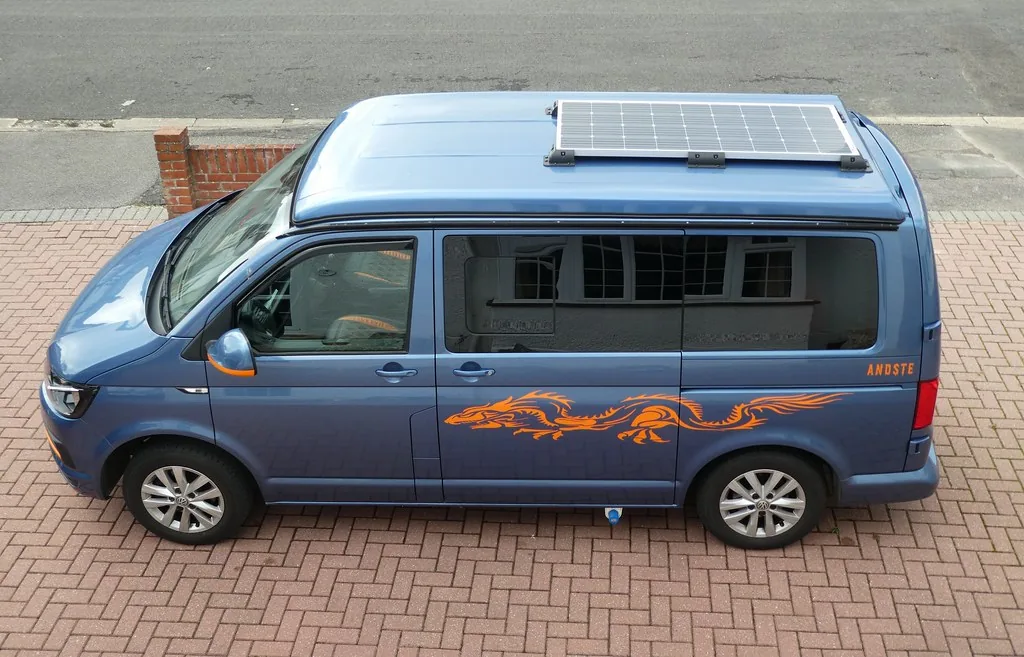
VoltPlan is now a Renogy affiliate partner. To mark the start, we built a complete van electrical system from Renogy parts and published it as a ready-made template in the VoltPlan editor: a 200 Ah lithium battery charged by the alternator, the sun and shore power, plus a 230 V inverter. You can open the Renogy van diagram, change it and save your own version for free.
This post goes through every part of that system: what it does, the figures that matter, and the wiring details from Renogy's manuals that are easy to miss. It is a researched guide, not a hands-on test. All figures come from Renogy's product pages, data sheets and manuals.
Disclosure: the product links in this post go to Renogy's shop for your region, and we earn a commission if you buy through them, at no extra cost to you. Renogy did not review this article before publication, and the assessments are our own, including the limits we point out.
Welcome code from Renogy: with the code VP6 you get 6 % off in Renogy's online shops in every country. The code comes from Renogy, which has not announced an end date; the conditions in Renogy's shop apply, for example whether the code combines with other promotions.
The system at a glance
| Role | Renogy part | Key figures |
|---|---|---|
| House battery | Core Mini 12.8 V 200 Ah LiFePO4 | 2560 Wh, 200 A BMS, IP65, 19.25 kg |
| Alternator charging | DCC50S 12 V 50 A DC-DC charger with MPPT | 50 A, works with smart alternators, solar input up to 50 V |
| Solar panels | 2× ShadowFlux 200 W N-type panel | 400 W, wired in series |
| Solar controller | Rover Li 40 A MPPT | up to 100 V PV input, 520 W at 12 V |
| Shore power | 12 V 20 A AC-to-DC LiFePO4 charger | 100-240 V AC in, 20 A out, fanless |
| 230 V | 2000 W pure sine wave inverter with UPS | 2000 W continuous, 4000 W peak |
The template also contains typical loads: a compressor fridge, LED lights, a USB charger and a water pump. Swap them for your own and the editor recalculates cables, fuses and runtime.
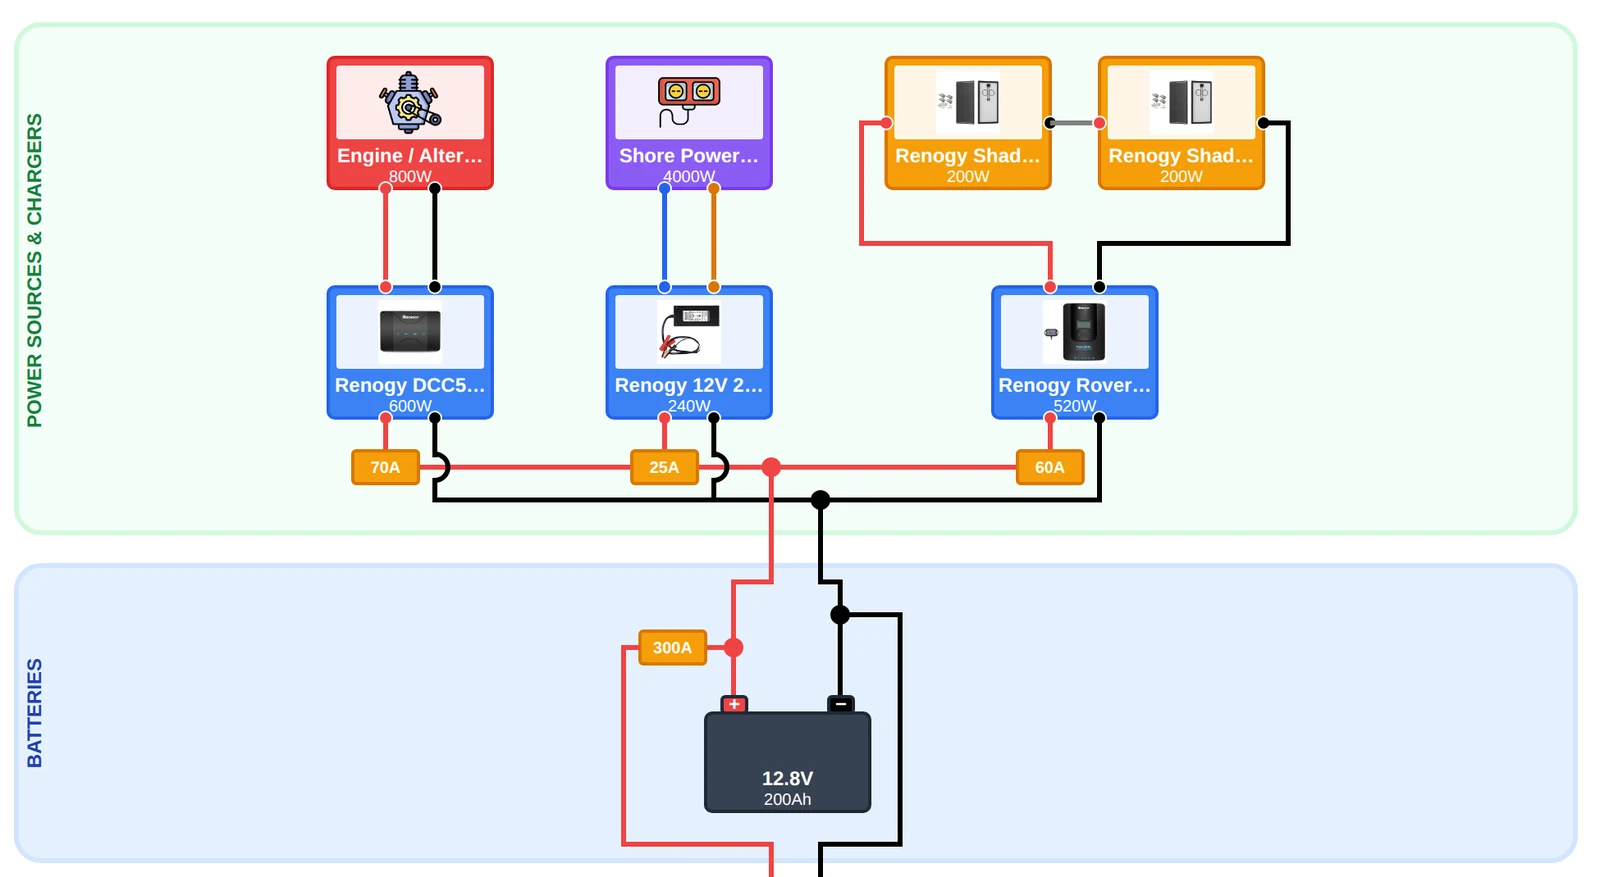
The charging side of the template as the VoltPlan editor draws it: three charge sources, each with its own fuse, feeding one 200 Ah battery. The editor sizes these fuses for the cable; for the DCC50S and the Rover, use Renogy's values given below. Open the full diagram to see the protection and load side too.
The battery: Core Mini 200 Ah
The Core Mini 12.8 V 200 Ah stores 2560 Wh. Renogy rates it for 5000 cycles at 80 % depth of discharge and gives it a 5-year warranty. It measures 384 × 194 × 253 mm, weighs 19.25 kg and is rated IP65.
The figures that shape the rest of the system:
- Discharge: 200 A continuous, 380 A for 10 seconds. That is the budget for the inverter (see below).
- Charge: up to 100 A continuous, 50 A recommended. Renogy's charge settings are 14.4 V with float disabled.
- Cold: charging stops at 0 °C and resumes at 5 °C; discharging stops at -20 °C. The battery has a low-temperature cut-off, not a heater. Mount it inside the heated living space, not in an outside locker. Our post on LiFePO4 in winter explains what that means for solar and alternator charging on cold mornings.
- No Bluetooth: the battery has no communication port. Renogy recommends its 500 A Battery Monitor to see the state of charge; our shunt installation guide shows where it goes.
Up to four Core Minis can run in series and up to eight in parallel. A second battery in parallel is the upgrade path if you want more runtime or more inverter headroom.
Alternator charging: DCC50S
On a winter trip the alternator is usually the strongest charge source. The DCC50S charges the house battery with up to 50 A from the starter battery and has an MPPT solar input on board.
- Smart alternators: a traditional alternator needs 13.2-16 V at the input. With a smart (Euro 6) alternator, the charger works from 12 V, but only if you connect its IGN wire to the vehicle ignition.
- Common negative: starter battery, solar input and house battery share one negative terminal. The DCC50S is not isolated.
- Cable: Renogy specifies 8 AWG for runs up to 3 m, 6 AWG for 3-6 m and 4 AWG for 6-9 m, for under 3 % voltage drop.
- Fuses: 75-100 A between starter battery and charger. On the house-battery side, Renogy's fuse sheet names 60 A, while the US product page lists 75-100 A; check the version of the manual that came with your unit.
Why a separate solar controller? The DCC50S solar input accepts at most 50 V. Two ShadowFlux 200 W panels in series reach 73 V open-circuit voltage, too much for that input. And when solar and alternator run together, the DCC50S splits its 50 A into at most 25 A from each. With the Rover handling the roof, the DCC50S can deliver its full 50 A from the alternator while the panels charge in parallel.
Solar: two ShadowFlux 200 W on a Rover Li 40 A
The ShadowFlux 200 W is a rigid N-type panel. Renogy's data: Vmp 31.3 V, Imp 6.38 A, Voc 36.5 V, Isc 6.86 A, 1262 × 764 × 30 mm and 10.81 kg each. Renogy states up to 85 % more output in partial shade than conventional panels, which matters on a van roof where a roof vent or a satellite dish casts shadows.
In the template both panels are wired in series:
| Value | One panel | Two in series |
|---|---|---|
| Open-circuit voltage at 25 °C | 36.5 V | 73.0 V |
| Open-circuit voltage at -10 °C (-0.25 %/°C) | 39.7 V | 79.4 V |
| Current at maximum power | 6.38 A | 6.38 A |
The Rover Li 40 A accepts up to 100 V, so even a frosty morning stays well below its limit. It is rated for 520 W of panels on a 12 V battery, so 400 W leaves room for one more small panel. Series wiring keeps the current low, which allows a thinner cable from the roof; our post on series vs parallel solar wiring covers the trade-off with shading.
Fusing per Renogy: on the battery side a 40 A fuse, matched to the controller rating; on the PV side Renogy's rule is the array short-circuit current × 1.56, here 6.86 A × 1.56 = 10.7 A. Choose the next standard size that does not exceed the panel's 15 A maximum series fuse. The controller has an IP32 rating and belongs inside the van.
For a curved or high roof where weight matters, the Flex ShadowFlux 200 W weighs 3.5 kg instead of 10.81 kg. Its open-circuit voltage is higher (44.1 V), so two in series give 88.2 V at 25 °C, and Renogy publishes no temperature coefficient for it. That leaves little margin to the Rover's 100 V on a frosty morning; wire two flexible panels in parallel instead.
Shore power: 20 A AC-to-DC charger
On a campsite with a hook-up, the 12 V 20 A AC-to-DC LiFePO4 charger refills the battery from 100-240 V AC. It charges in three stages at 20 A, is fanless and can wake a battery whose BMS has switched off. Its manual says not to charge LiFePO4 below 0 °C, the same limit as the battery.
20 A suits this system: at 20 A, a half-empty 200 Ah battery needs about five hours of charging, and together with full solar (about 28 A) the charge current stays below the battery's recommended 50 A.
230 V: the 2000 W inverter
The 2000 W pure sine wave inverter supplies two 230 V sockets with 2000 W continuous and 4000 W peak. Its UPS function switches to shore power automatically when a 230 V supply is plugged into its AC input, and back to the battery within 50 ms.
Three numbers to plan around:
- Battery current: at 2000 W the inverter draws about 185 A from a 12 V battery, assuming about 90 % efficiency (Renogy publishes no efficiency figure for this model). That is close to the Core Mini's 200 A continuous rating, and the 4000 W peak is close to its 380 A for 10 seconds. One battery handles a kettle or a coffee machine; for long heavy loads such as an induction hob, a second battery in parallel halves the current per battery. Check your own loads with the inverter size calculator.
- Fuse and cable: the manual specifies a 250 A fuse in the battery positive. Renogy's product page names 1/0 AWG (about 53.5 mm²) cable. Keep the cables short and size them with the wire gauge calculator.
- Standby draw: the inverter draws 1.3 A with no load. Left on for 24 hours that is about 31 Ah, roughly a sixth of the battery. Switch it off when you don't need 230 V.
One limit matters for the 230 V side. Renogy's manual describes no neutral-earth bond in inverter mode and warns against connecting loads whose neutral is connected to earth. Plug your appliances straight into the inverter's sockets. A fixed 230 V installation with an RCD and its own outlets is a different design; for that, an inverter-charger with an earth relay is the better fit, and the installation belongs in the hands of an electrician. We explain the background in our post on the Renogy 1000 W inverter on boats. In a van, the setup with appliances plugged in directly is what this inverter is built for.
In the US and Canada, Renogy sells a 120 V version of the 2000 W inverter with a different feature set, including a built-in GFCI and a switchable neutral-ground bond. The figures above apply to the 230 V version.
How the chargers work together
| Charge source | Maximum current | When it charges |
|---|---|---|
| DCC50S (alternator) | 50 A | while driving |
| Rover Li 40 A (400 W solar) | up to about 28 A (400 W at 14.4 V) | daytime |
| 20 A shore charger | 20 A | on a hook-up |
All three can run at once: in the sun on a campsite with the engine running, that adds up to nearly 100 A, the Core Mini's maximum continuous charge current. In practice you rarely drive and sit on a hook-up at the same time, so the battery mostly sees one or two sources well below that. All three chargers need their lithium profile set: "Li" on the DCC50S, the lithium mode on the Rover with its 14.4 V boost default. The AC charger is fixed at its lithium voltage.
Make it your own
The template is a starting point, not a prescription. Typical changes:
- More runtime: add a second Core Mini in parallel and watch the runtime figure in the editor.
- Less 230 V: if you only charge a laptop, a smaller inverter cuts the standby draw and the battery current.
- More solar: the Rover has room up to 520 W at 12 V; beyond that, the Rover Li 60 A is the next size.
Open the Renogy van template, adjust the cable lengths to your van and the editor sizes every cable and fuse. VoltPlan sizes fuses for the cable; where Renogy's manual names a value for a device, use the manual value. Prices change often and vary by region, so check the current price in the shop before you order.
FAQ
Can one Core Mini 200 Ah run a 2000 W inverter?
Yes, but with little headroom. At 2000 W a 12 V inverter draws about 185 A, close to the battery's 200 A continuous rating, and the inverter's 4000 W peak comes close to the 380 A the battery allows for 10 seconds. For short loads like a kettle that works; for long heavy loads, add a second battery in parallel.
Why does the system need a Rover Li when the DCC50S has a solar input?
The DCC50S solar input accepts at most 50 V, and two ShadowFlux 200 W panels in series reach 73 V open-circuit voltage. When solar and alternator run together, the DCC50S also limits each source to 25 A. A separate Rover lets the alternator deliver the full 50 A while the panels charge independently.
Can the Core Mini be charged in winter?
Only when the cells are warm enough. The battery stops charging at 0 °C and resumes at 5 °C, and it has no built-in heater. Mount it inside the heated living area, so the heater keeps it above freezing.
Can I connect an RCD after the Renogy 2000 W inverter?
Renogy's manual for the 230 V model does not describe a neutral-earth bond in inverter mode and warns against loads with neutral connected to earth. Without that bond an RCD has no reference and cannot work as intended. Use the inverter's own sockets; for a fixed 230 V installation with an RCD, choose an inverter-charger with an earth relay and have it installed by an electrician.
Can I change the template?
Yes. The template opens in the free editor. You can swap components, add loads, change cable lengths and save your own copy after a free sign-up. The original template stays unchanged.
This article was created with the assistance of AI.
Ready to Design Your Electrical System?
Use VoltPlan's free electrical system designer to turn these concepts into reality.
Start Your Project